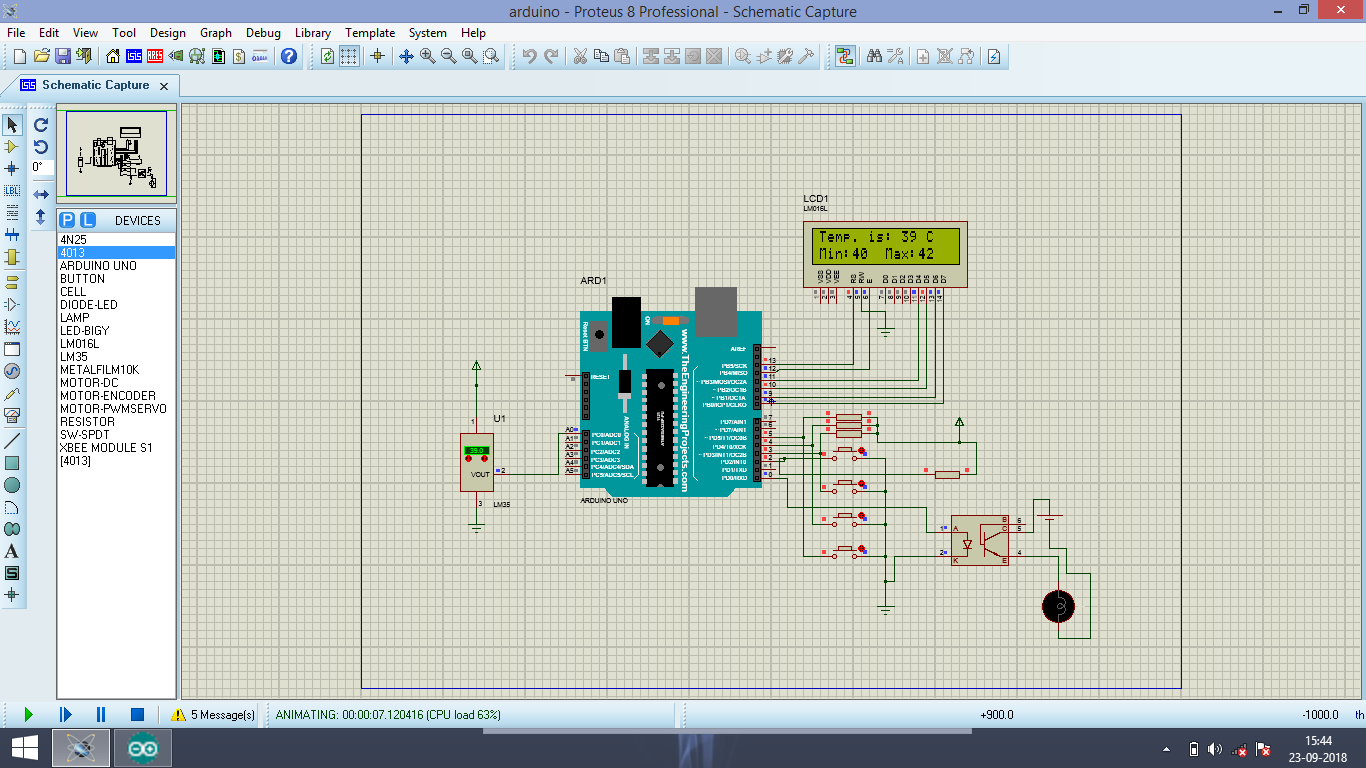
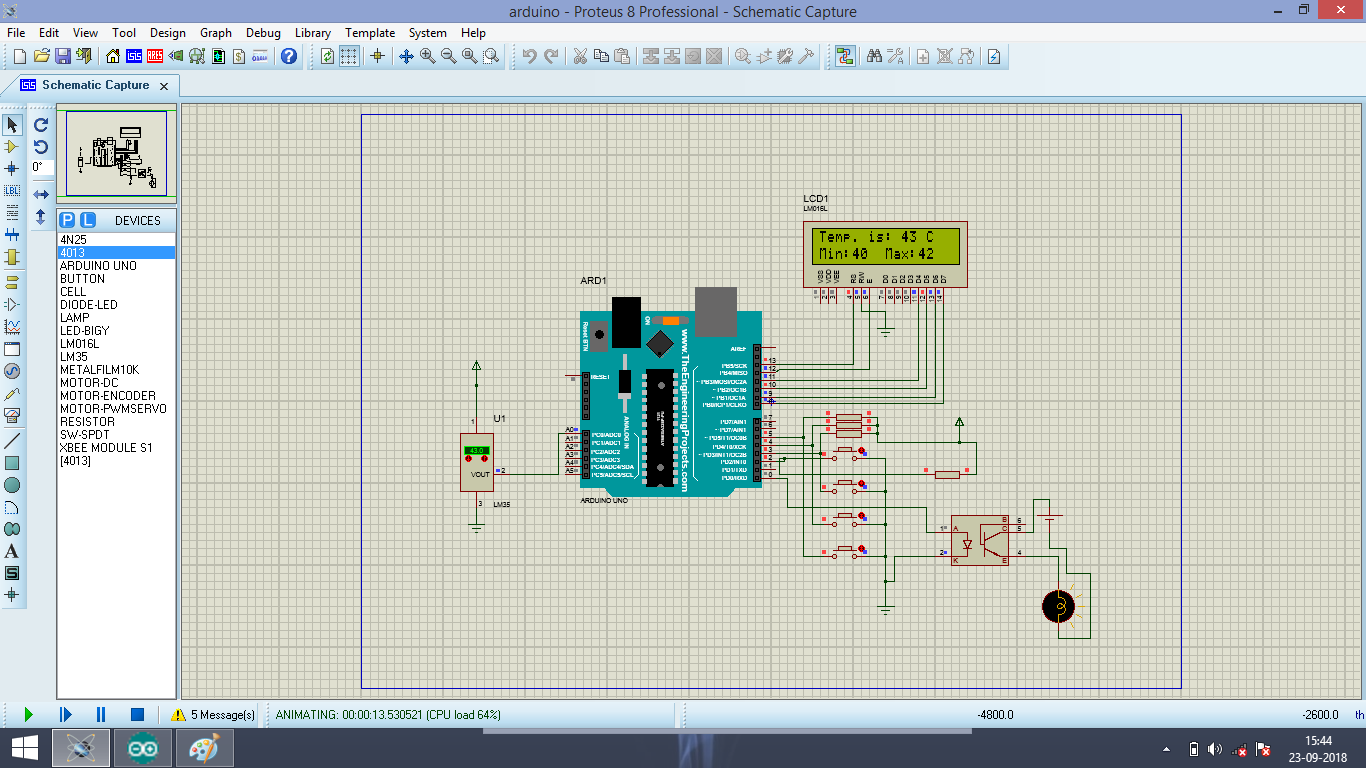
The picture basically describes an ON-OFF controller. Here bulb is taken as an example of machine, when machine temperature is above high set-point the optocoupler trips Machine from main line & when machine temperature is below lower set-point the optocoupler connects Machine from main line. Hence selecting the dead band is taken into concern considering accuracy of the sensor.
Program Code:
#include<LiquidCrystal.h>
int x=40,y=40;
LiquidCrystal lcd (13,12,11,10,9,8);
void setup() {
lcd.begin(16,2);
pinMode(0,OUTPUT);
pinMode(3,INPUT);
pinMode(4,INPUT);
pinMode(5,INPUT);
pinMode(2,INPUT_PULLUP);
attachInterrupt(0,set,LOW);
}
void loop() {
disp();
}
void disp()
{ lcd.clear();
int a=analogRead(A0);
int b=map(a,0,255,0,126);
lcd.setCursor(0,0);
lcd.print(“Temp. is:”);
lcd.setCursor(10,0);
lcd.print(b);
lcd.print(" C");
lcd.setCursor(0,1);
lcd.print(“Min:”);
lcd.print(x);
lcd.print(" “);
lcd.print(“Max:”);
lcd.print(y);
if(b<x)
digitalWrite(0,LOW);
if(b>y)
digitalWrite(0,HIGH);
if(x>y)
{ lcd.clear();
lcd.setCursor(0,0);
lcd.print(”"ERROR");
exit(0);
}
delay(1000);
}
void set()
{
lcd.clear();
lcd.setCursor(0,0);
lcd.print(“Set Min. Temp.:”);
int a,b,c;
do
{ a=digitalRead(3);
b=digitalRead(4);
c=digitalRead(5);
if(b==0)
x++;
if(c==0)
x–;
lcd.setCursor(0,5);
lcd.print(x);
delay(4000);
}while(a!=LOW);
delay(5000);
lcd.clear();
lcd.setCursor(0,0);
lcd.print(“Set Max. Temp.:”);
do
{ a=digitalRead(3);
b=digitalRead(4);
c=digitalRead(5);
if(b==0)
y++;
if(c==0)
y–;
lcd.setCursor(0,5);
lcd.print(y);
delay(4000);
}while(a!=0);
}
For 8051 based project refer :
Temperature Indicator using 8051
Machine Temperature Controller Using 8051